
SCIM 2.0 User Provisioning
SCIM is a standard for synchronizing users between systems, which Lyyti supports as a paid feature. It can be used with any SCIM-compatible user management system, such as Okta or Entra, to automate Lyyti user creation and deactivation. Contact your sales representative or support to set this feature up for your company!
Everything below this point is technical documentation intended for your organization's IT admins!
General information
Endpoints
Our base URL is https://www.lyyti.fi/n/scim/v2
We provide a SCIM schema endpoint with details on what fields we support, and how you can use them:
https://www.lyyti.fi/n/scim/v2/Schemas
We use Bearer tokens for authentication. You will receive this token from Lyyti when the feature is activated for your organization. It is NOT stored in Lyyti, so be careful to not lose it!
User endpoints
| endpoint | Comments |
|---|---|
| GET https://www.lyyti.fi/n/scim/v2/Users | Get all users |
| GET https://www.lyyti.fi/n/scim/v2/Users/{id} | Get a specific user |
| POST https://www.lyyti.fi/n/scim/v2/Users | Create a new user |
| PATCH https://www.lyyti.fi/n/scim/v2/Users/{id} | Update a user |
| PUT https://www.lyyti.fi/n/scim/v2/Users/{id} | Update a user. This is implemented as a PATCH, except for the userName and name fields, which must be specified. The SCIM standard allows this, and it ensures that the IdP doesn't accidentally clear fields that it's not configured for. |
| DELETE https://www.lyyti.fi/n/scim/v2/Users/{id} | Deactivate a user (same as updating with active=false) |
Group endpoints
DISCLAIMER: Okta does not support working with groups owned by a third party (Lyyti), and it has not been tested with Entra ID. Neither system supports custom SCIM extensions as per the SCIM standard, without which you really cannot use the group endpoints in any reasonable manner. If you're using those systems, just skip the group endpoints!
Groups correspond to Lyyti organizations. They are read-only, but can be assigned to users. Note that they can only be assigned to users who do not yet have any events. Contact Lyyti support if you need to move an existing user.
| endpoint | Comments |
|---|---|
| GET https://www.lyyti.fi/n/scim/v2/Groups | Get all groups |
| GET https://www.lyyti.fi/n/scim/v2/Groups/{id} | Get a specific group |
| PATCH https://www.lyyti.fi/n/scim/v2/Groups/{id} | Move one or more users to an organization |
Meta endpoints
The SCIM standard includes public endpoints listing the capabilities of our service. Some provisioners might want to read them.
| endpoint | Comments |
|---|---|
| https://www.lyyti.fi/n/scim/v2/ServiceProviderConfig | General API information |
| https://www.lyyti.fi/n/scim/v2/ResourceTypes | |
| https://www.lyyti.fi/n/scim/v2/Schemas | What user attributes we support |
Supported fields
| Field path | Mutability | Comments |
|---|---|---|
| userName | create/update | Must be a valid unique email. |
| name.givenName | create/update | Mandatory. |
| name.familyName | create/update | Mandatory. |
| name.formatted | readonly | "givenName familyName" |
| active | create/update | Optional. Can be used to lock (deactivate) a user. Locked users will be permanently deleted after 2 years. |
| emails[0].value emails[0].type emails[0].primary | readonly | value is the same as userName. type is always "work" primary is always true. |
User logins
User passwords cannot be created or updated through our SCIM APIs. Any organizations using SCIM should also use SAML SSO logins.
Okta
Making SCIM work in Okta can be quite the challenge, as there are many important checkboxes spread across multiple well-hidden pages, that all need to be set correctly for it to work. We recommend that you read the Okta documentation on the subject carefully as a complement to this guide. Note that Okta tells you how to publish an integration - you should not do that. Just create the integration as per this guide and verify it works for your needs.
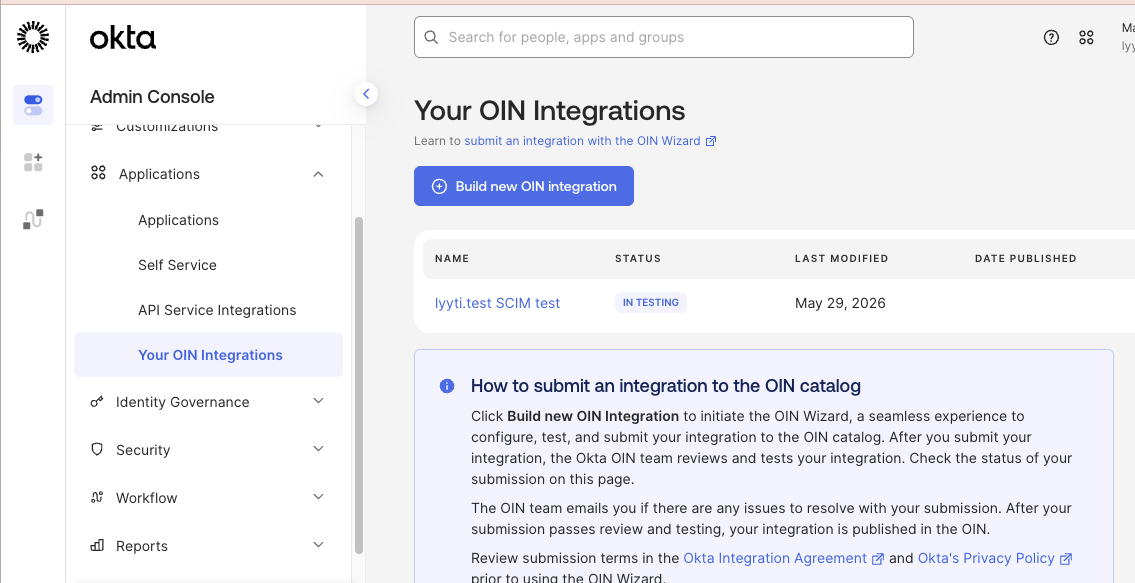
To set up a SCIM integration in Okta, you first need to create an "OIN integration". You can find the create button under Applications > Your OIN Integrations:
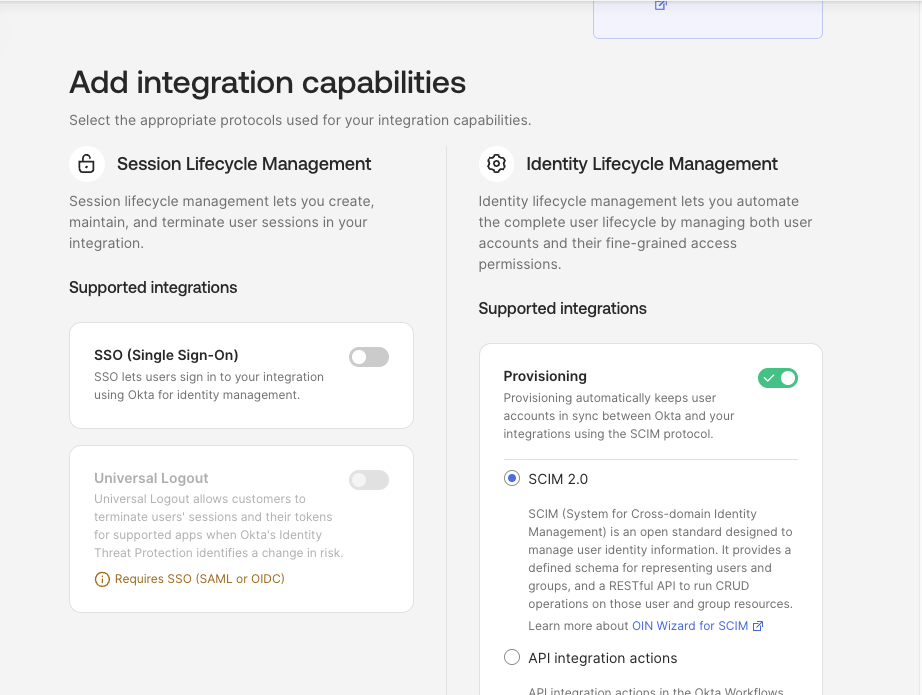
On the first setup page, select provisioning and SCIM 2.0:
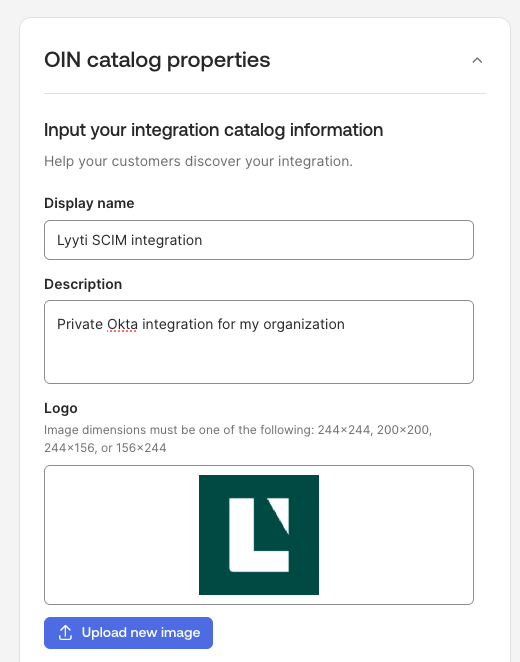
On the next page, enter a name and description for the integration, and upload an image. You can use the Lyyti logo below

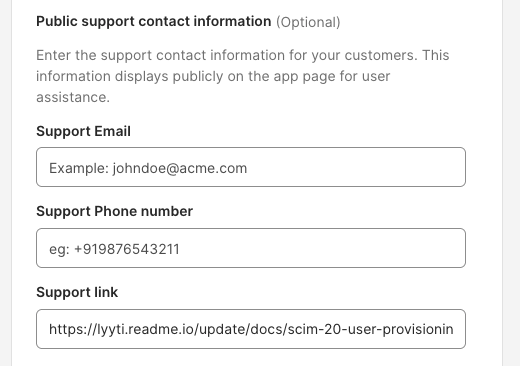
Paste the link to this page in the support link field, unless you have your own internal instructions for this process. Enter your own details as support contact if required.
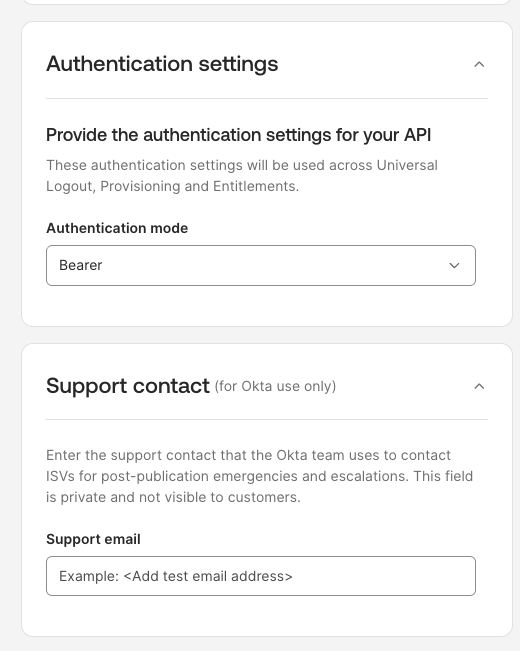
Next, scroll down to Authentication settings, where you should choose Bearer from the dropdown. Put your own email in the support contact field.
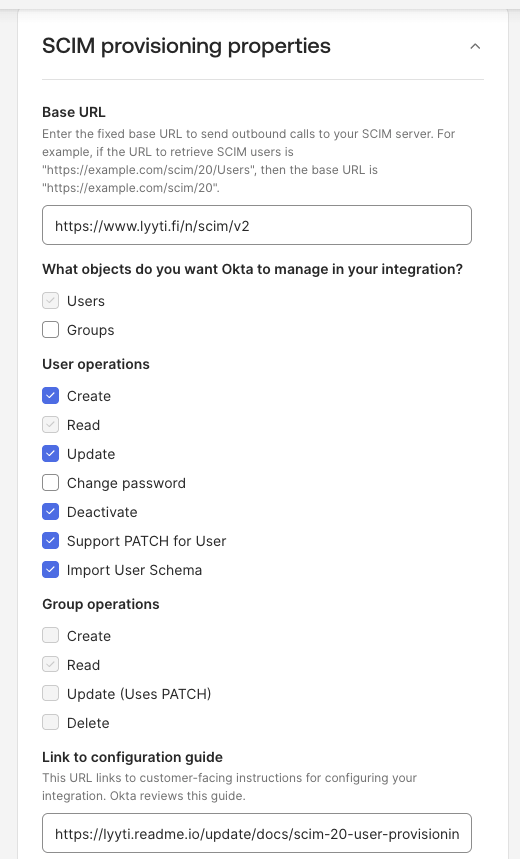
Then go to the next page, where you will enter the base URL for the lyyti SCIM integration, and select which operations should be activated. Check these checkboxes very carefully to ensure your integration will work as you intend. We do not support groups and password changing, so leave those unchecked. Put the link to this guide there.
If you are getting a nonsensical error message about the Uri's "expression language syntax", make sure there is no whitespace around the base URL.
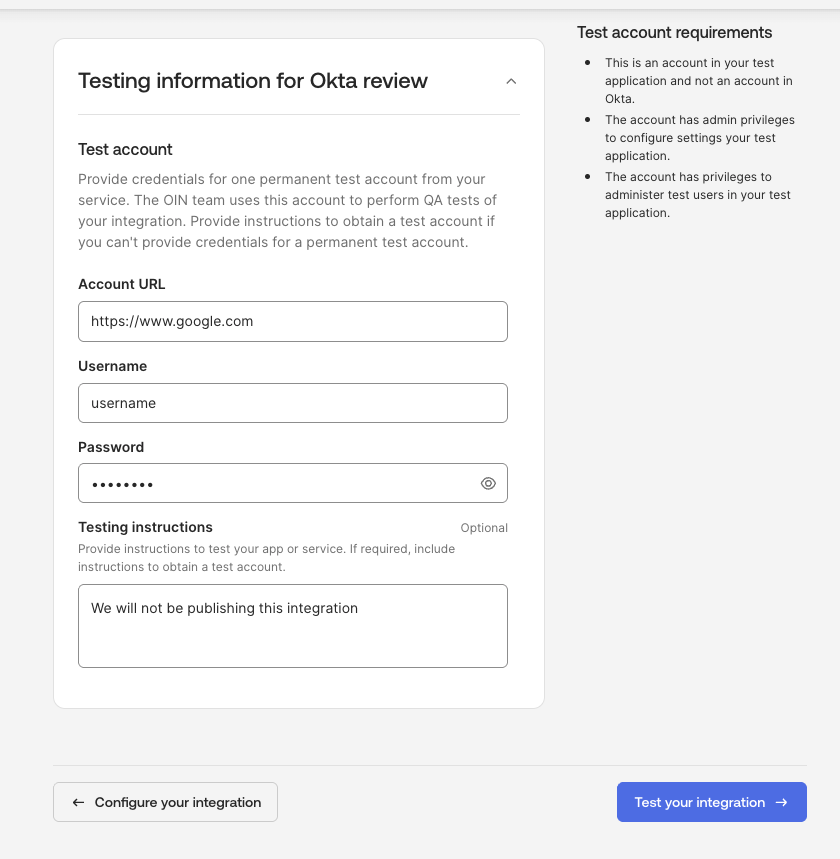
The next page is only relevant if you're going to publish an integration, so just enter some random data there and go to the next page.
Now the core of the integration should be set up.
You should now see it under "Your OIN integrations":
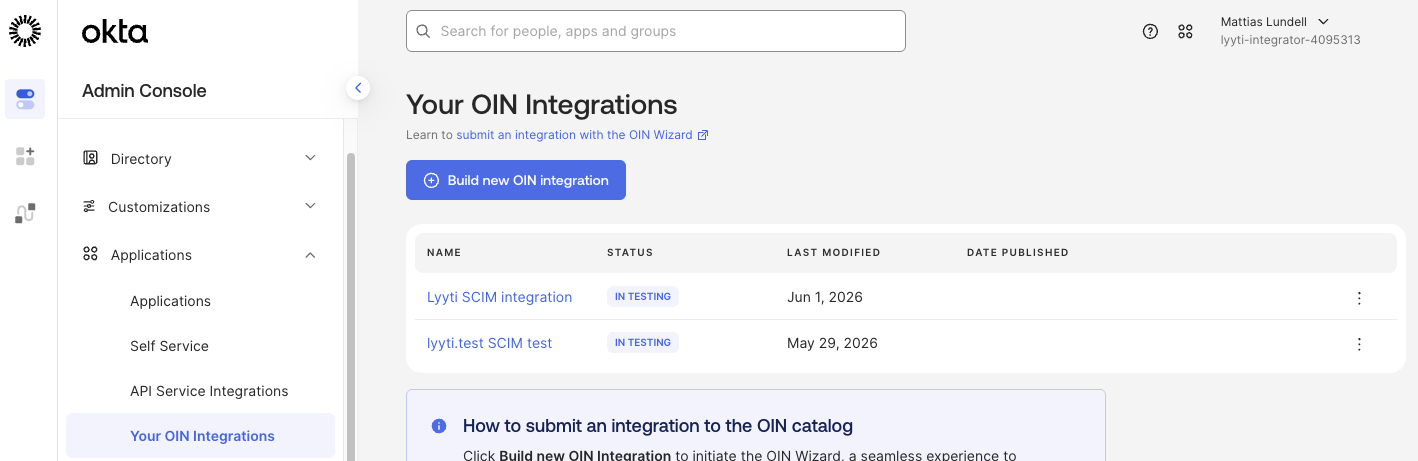
Then you need to generate an instance of it to actually use it. You do so by clicking on the hamburger icon to the far right of the row, and selected "test instance", which takes you to this page:
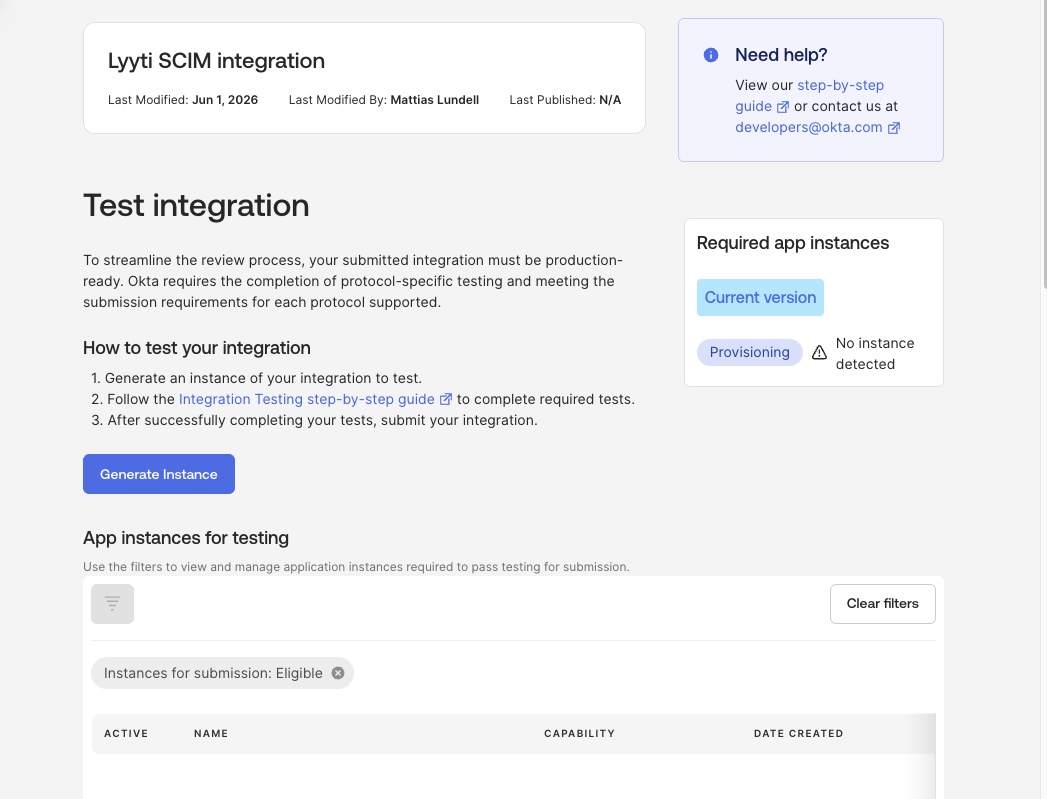
Click "Generate Instance"
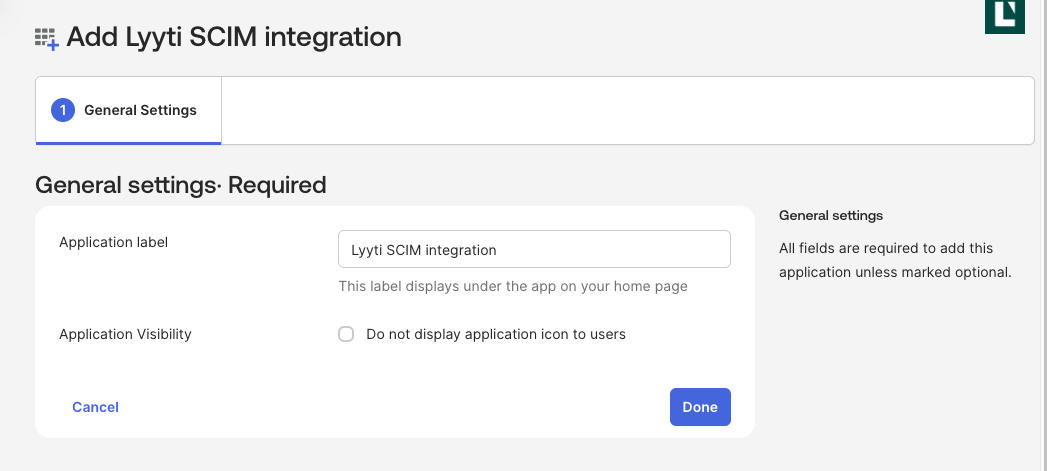
Give it a name and click Done, and you should have an application instance:
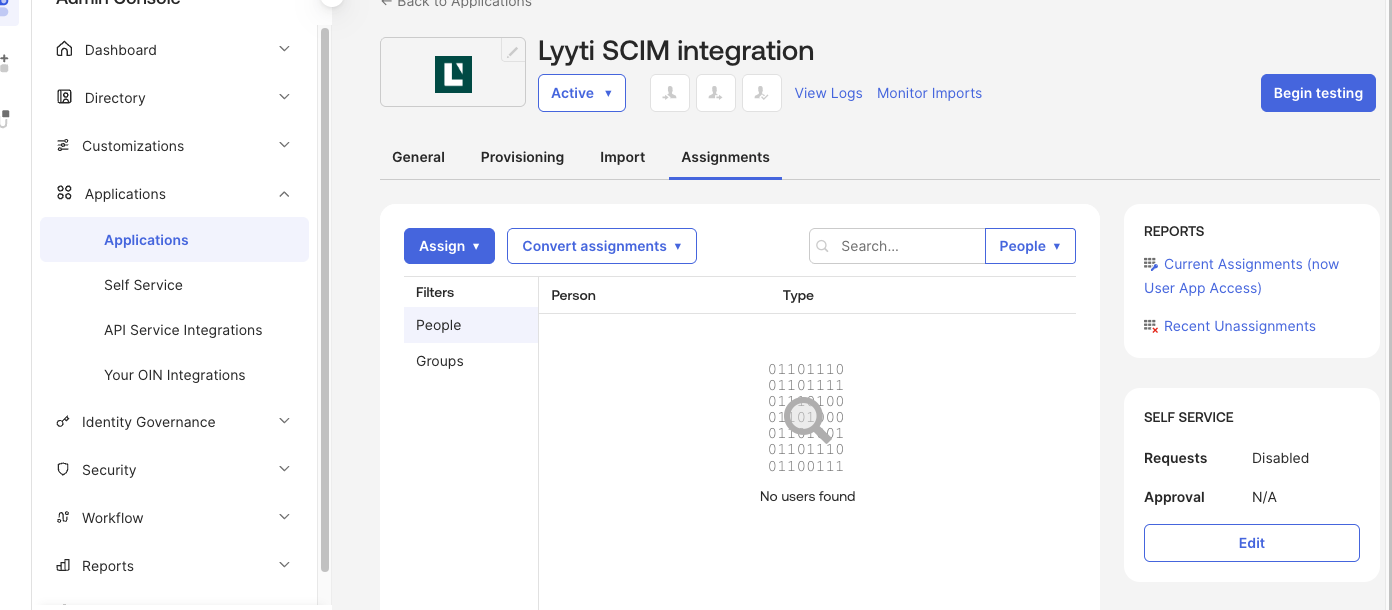
Go to the provisioning tab to configure:
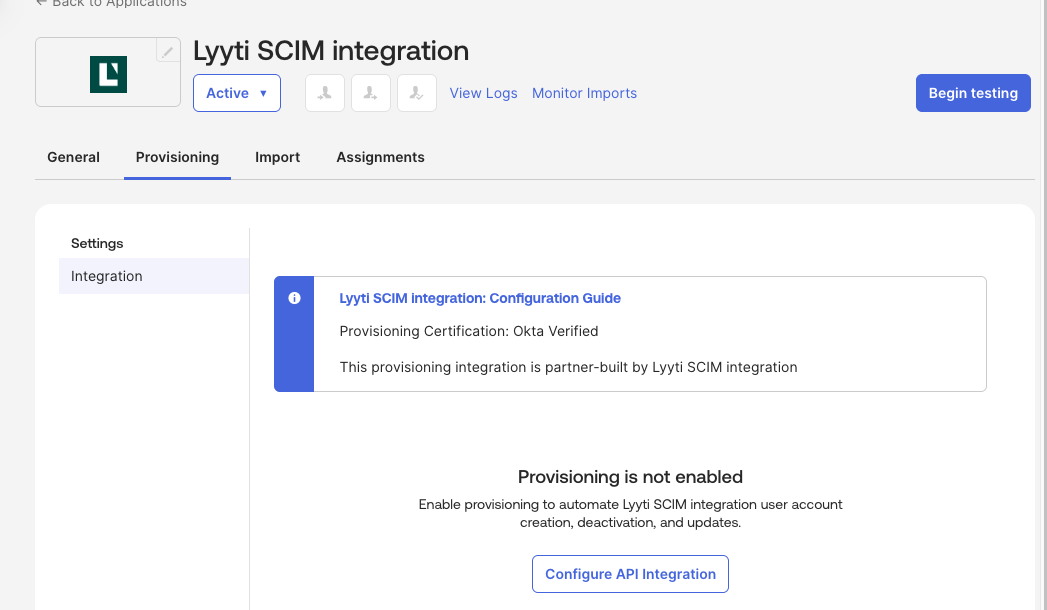
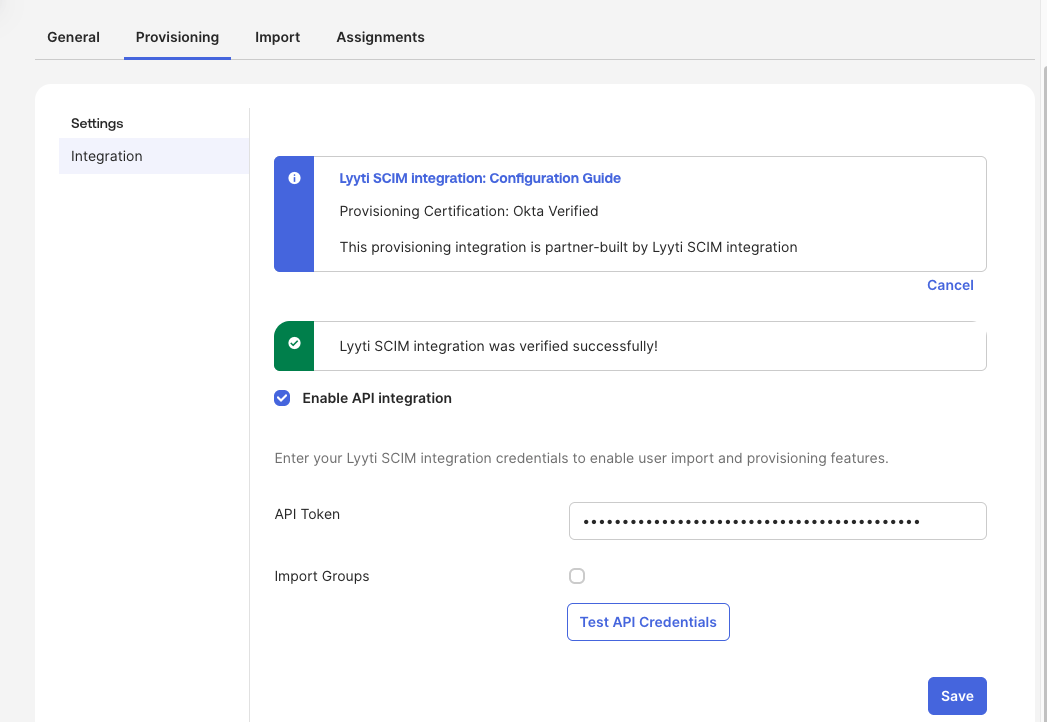
After clicking configure, check the box and enter the API token that you got from Lyyti. Uncheck "import groups", and make sure that it actually works by pressing the test button:
The provisioning tab gets new content:
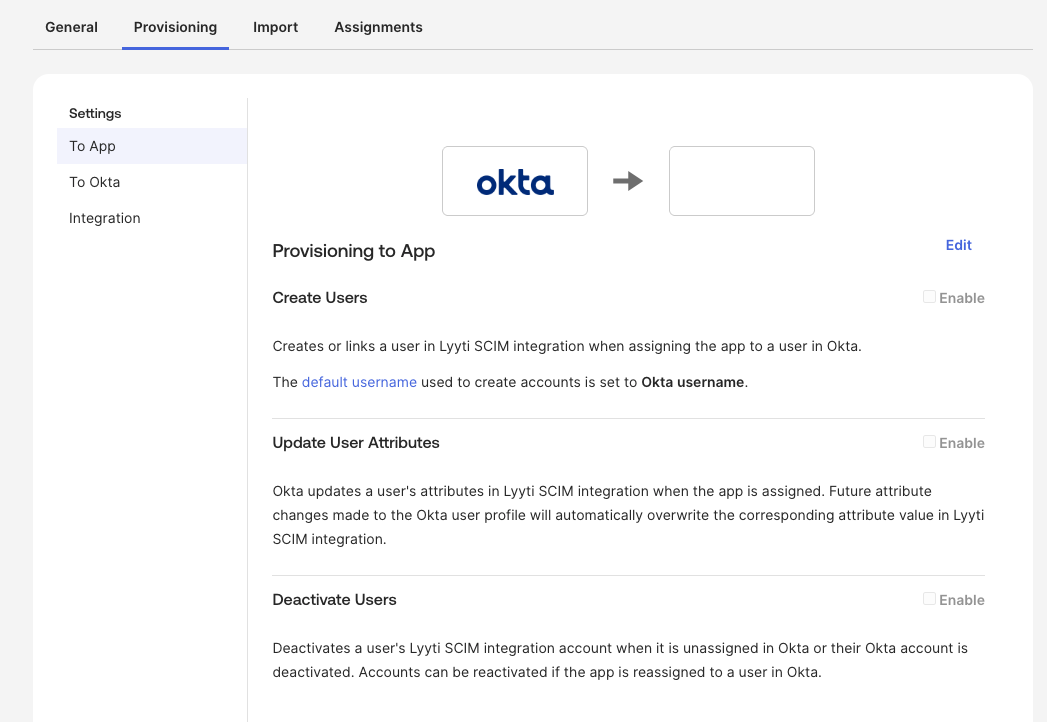
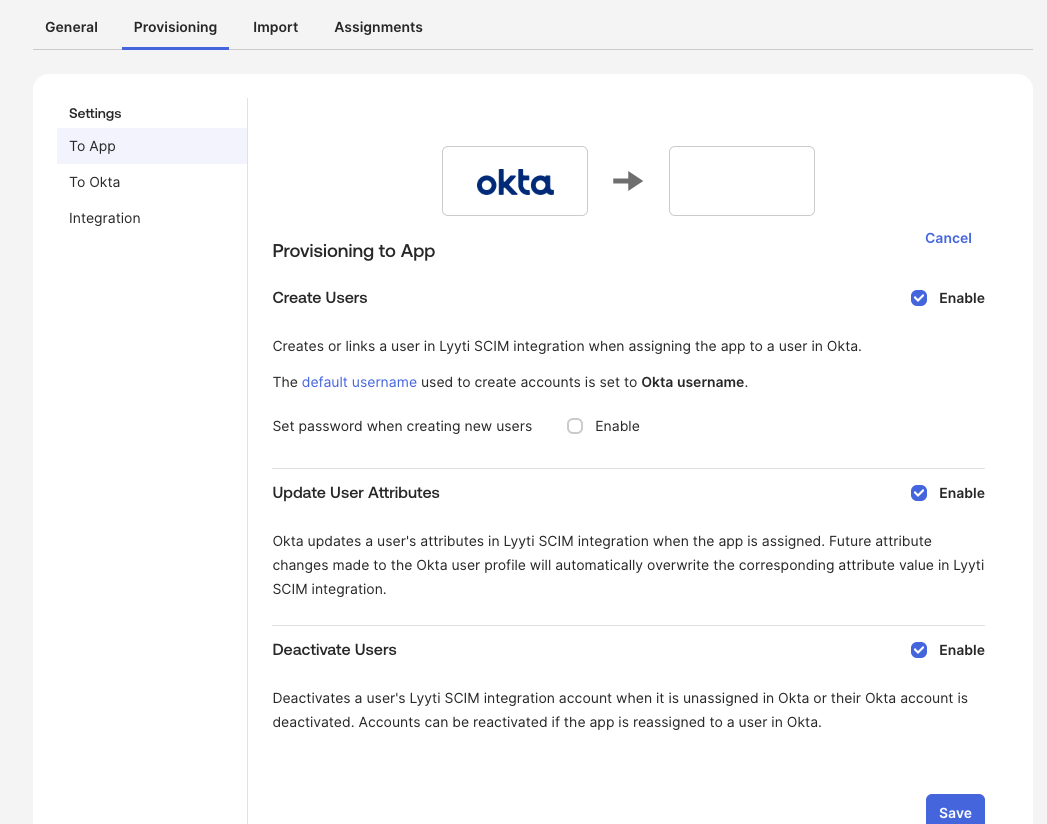
Click the edit text to the right, and select the checkboxes that apply to your use case. Remember to uncheck "Set password when creating new users", or you might get weird error messages later.
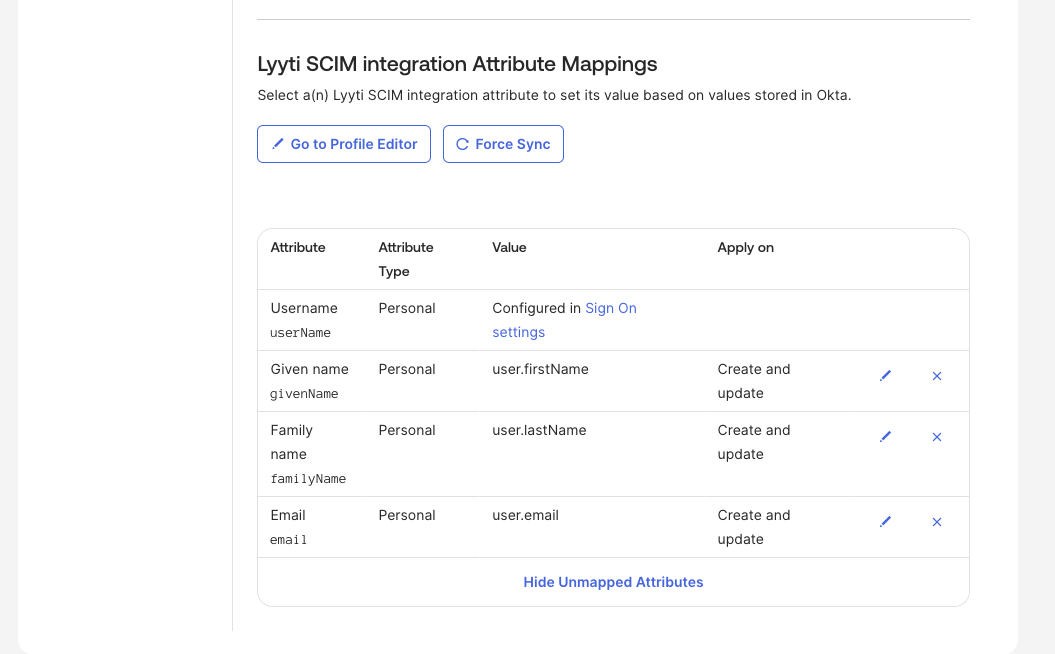
Further below, you have the field mappings. The defaults should be fine, but if you want to configure the organization field, then you need to set that up separately in your user profile directories.
Now you should be able to provision users from Okta to Lyyti. We recommend first trying to provision a single user that you know already exists in Lyyti, just to ensure everything is set up as intended before you start creating new users in Lyyti.
Go to the assignments tab in your application instance, and assign a user:
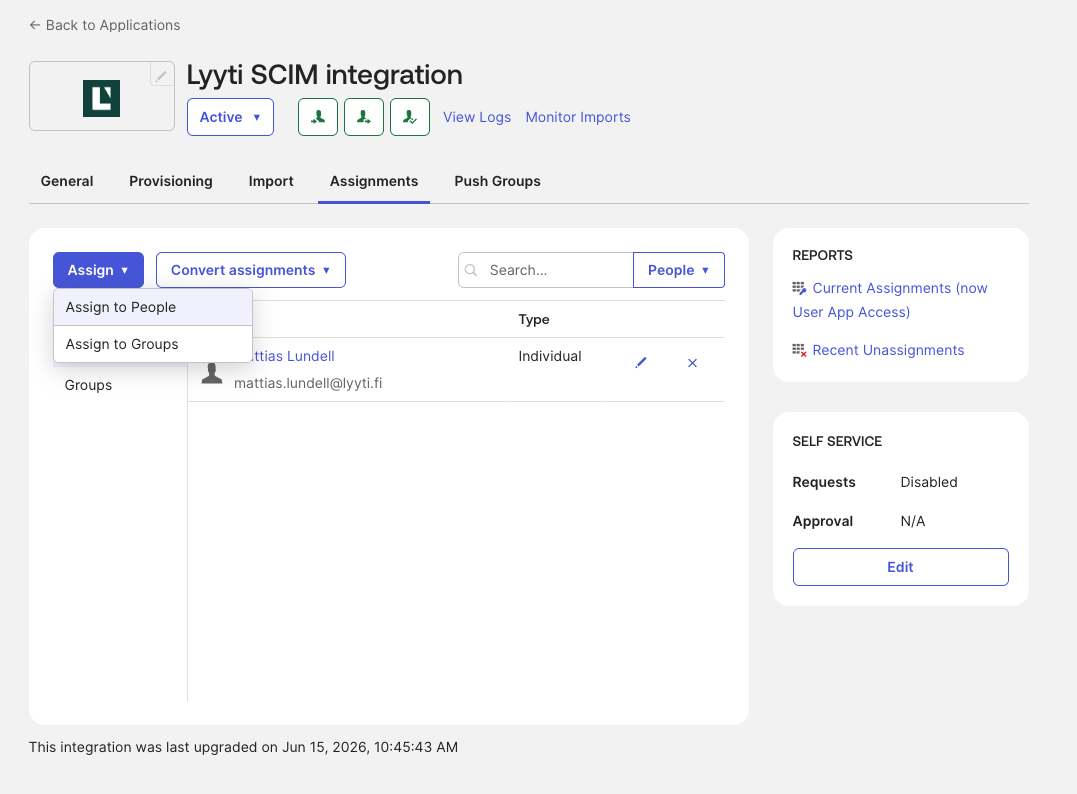
If all goes well, it should find the user in Lyyti, and connect it to the chosen Okta user. If there's a red exclamation mark, it means something went wrong.
Troubleshooting
If there is something wrong with the integration, you will see a red exclamation mark next to the assigned user:
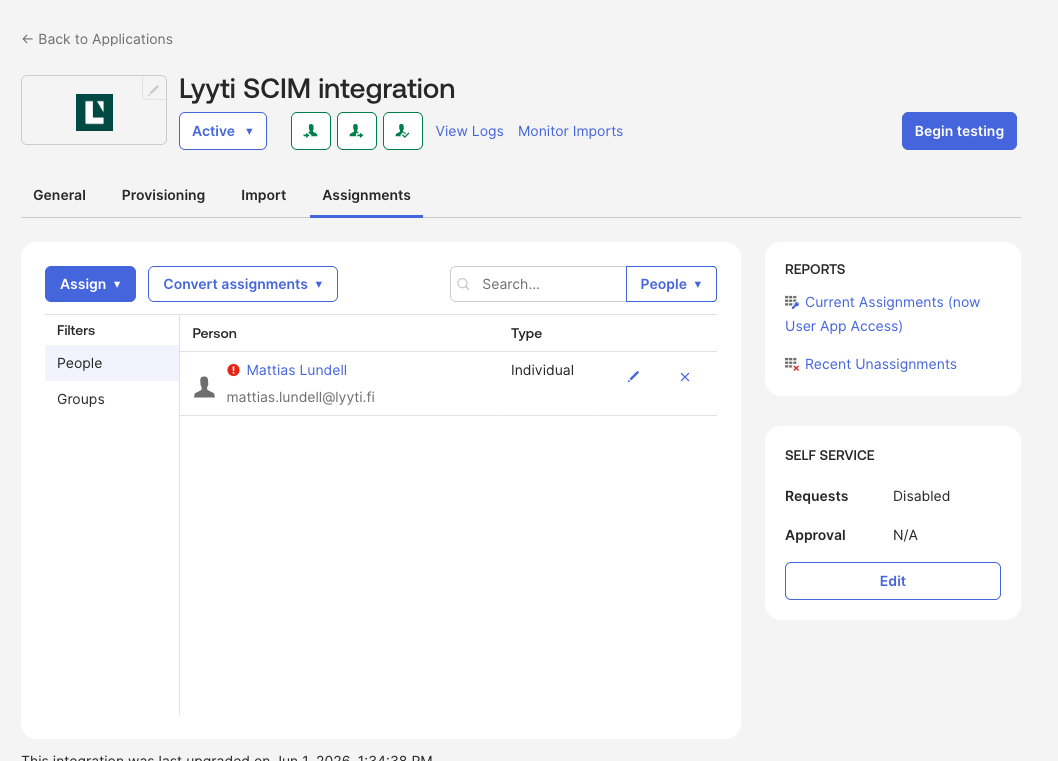
By clicking on it, it shows the error message. Sometimes it is somewhat clear in what the problem is, while other times it's complete nonsense. Below are some error messages we have seen when testing internally at Lyyti:
| Action | Error message | possible explanations |
|---|---|---|
| Create | User does not exist | You have likely forgotten to check "create user" in the OIN integration SCIM provisioning settings. |
| Anything | ...FORBIDDEN... | First check that the integration can connect to Lyyti under the provisioning tab -> Integration settings. if this fails, you have an invalid API token, and either need to find the correct one, or get a new one from Lyyti. If it looks good when clicking "Test API credentials", contact Lyyti support, as it is likely to be Lyyti's security system blocking a specific request that contains some kind of data that was flagged as malicious, and we need to add an exception for that. |
| Anything | Field xyz does not exist / unsupported | There is something wrong with your field mapping. If you have significantly edited them manually, it might be easiest to delete the application instance and start over with the configuration from scratch. |
Entra
To set up SCIM in entra, you need to create an enterprise app first. You need to do it EXACTLY like described here. it does not work if you create it through "App registrations" item.
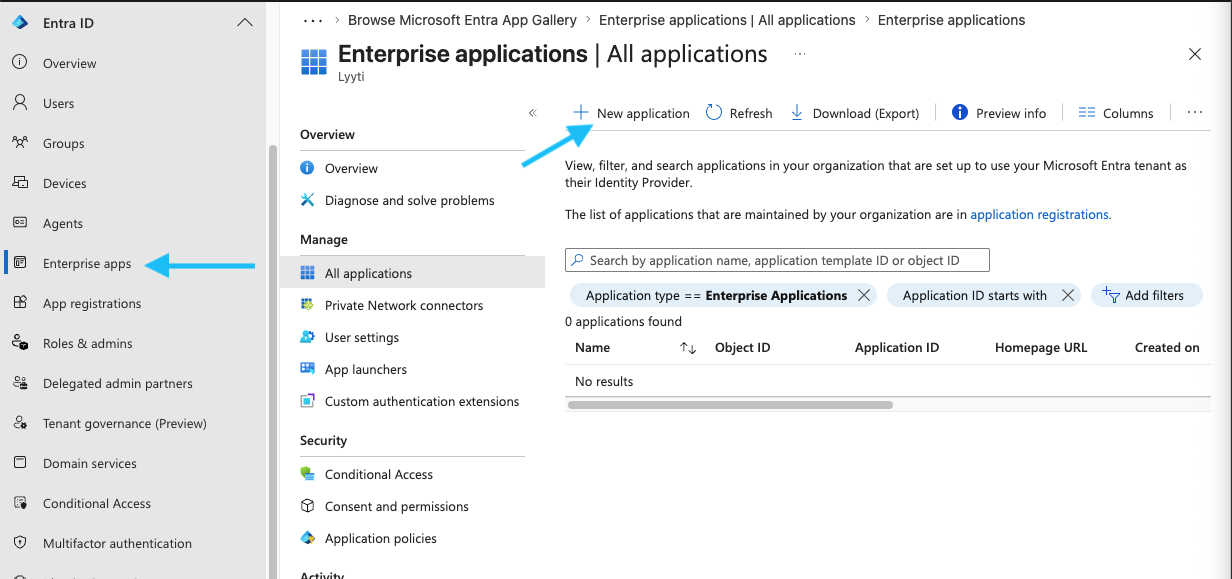
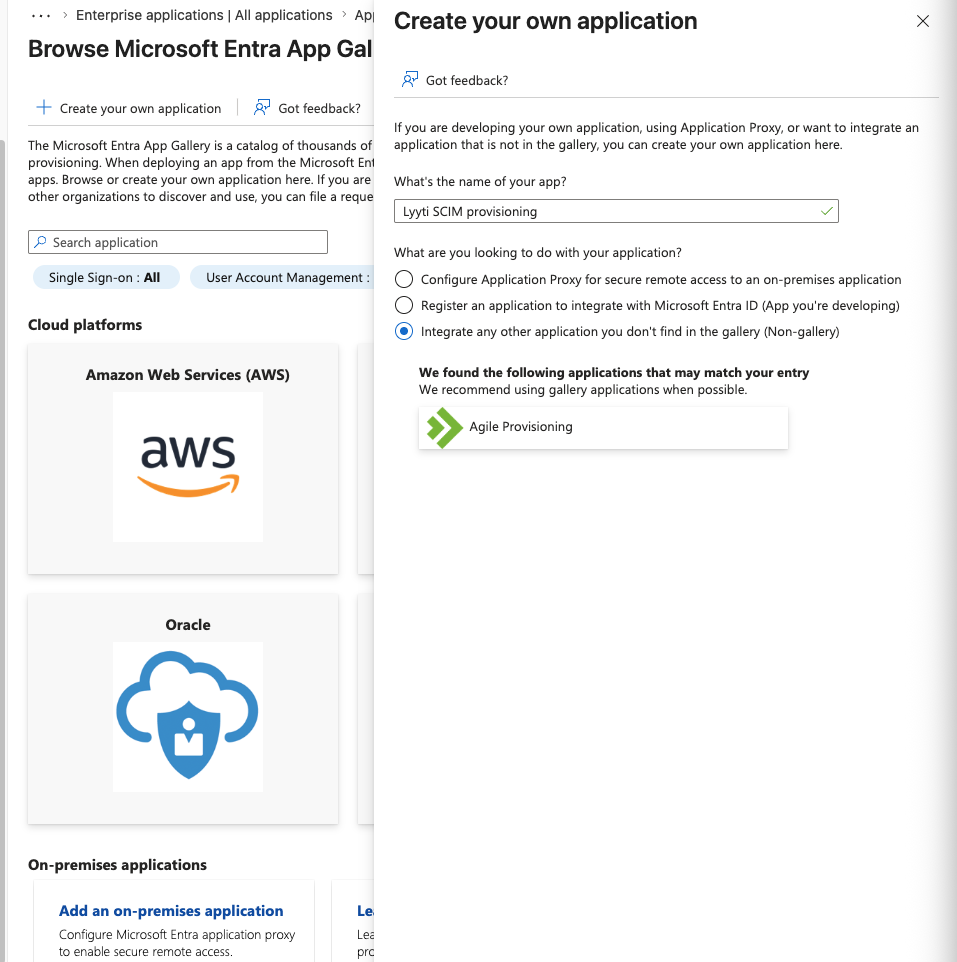
On the next page there are a lot of options that don't work. You need to click "Create your own application" only:
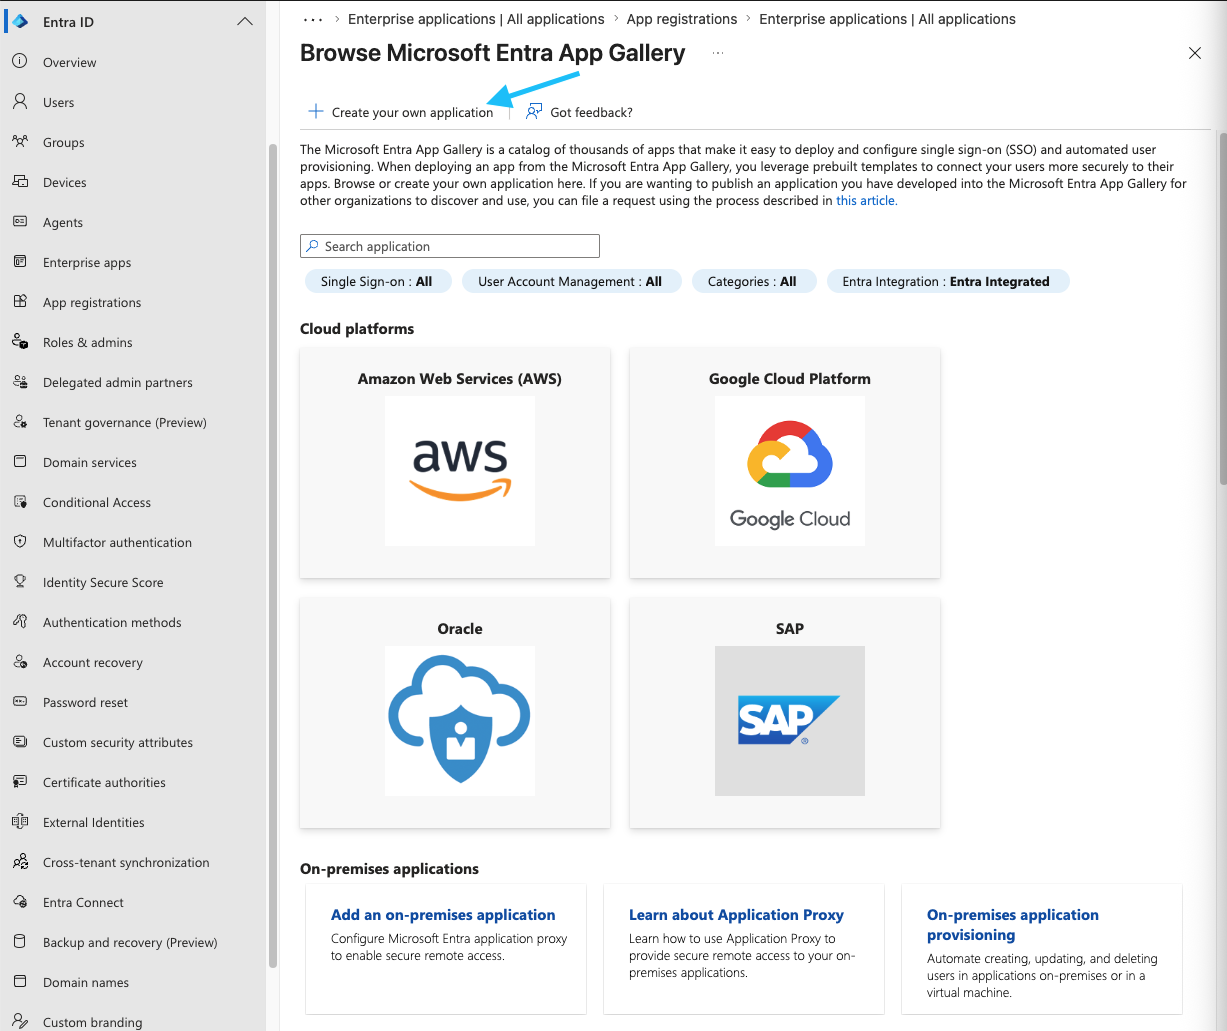
Enter a name for the app, and select the non-gallery option. A Lyyti integration may pop up when you write the name. DO NOT select it.
After you save, go to enterprise apps to see it:
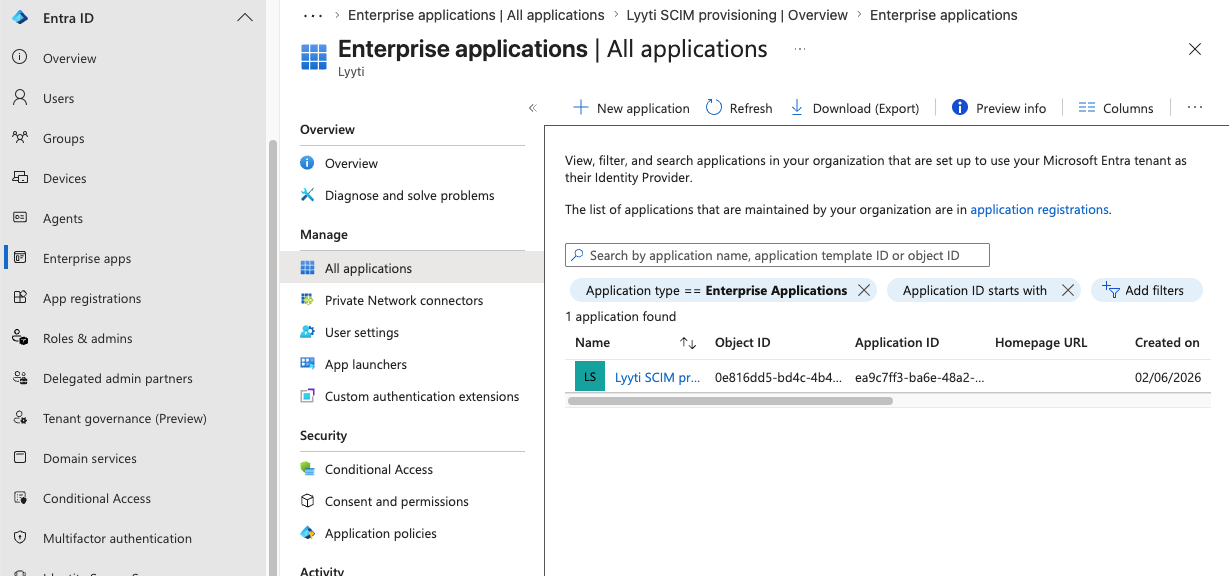
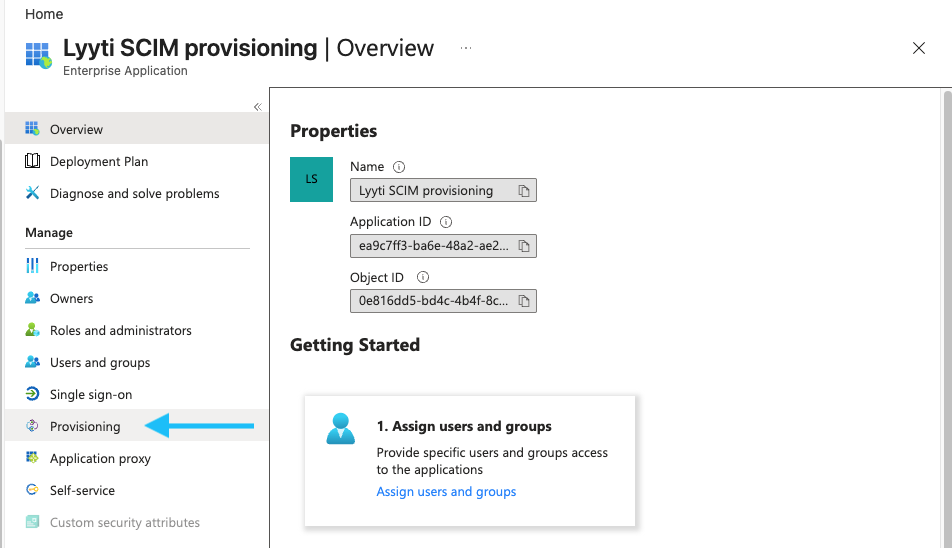
Select the newly created app, then click provisioning in the list.
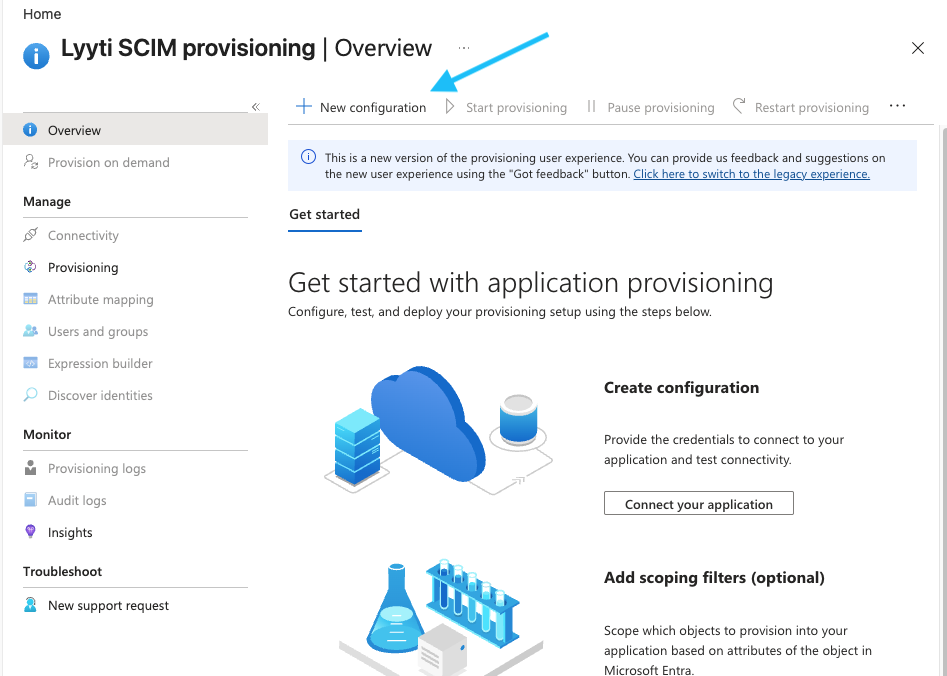
If you set it up in the correct way, you should now be able to configure the provisioning. If not, delete the application and start over and make sure you follow the previous steps exactly. Click New configuration at the top:
On the next page, choose Bearer authentication, and add the URL https://www.lyyti.fi/n/scim/v2
Also paste in the secret token you got from Lyyti. Test the connection to verify you entered the correct details and that your token works.
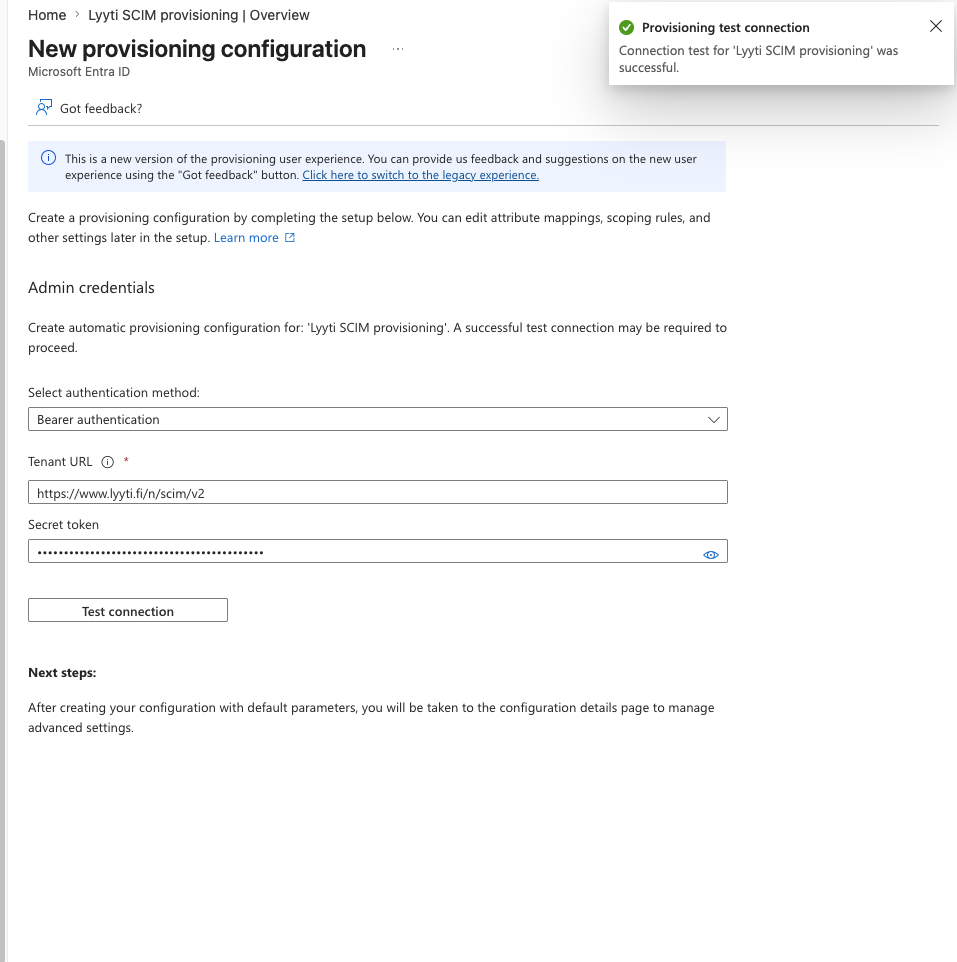
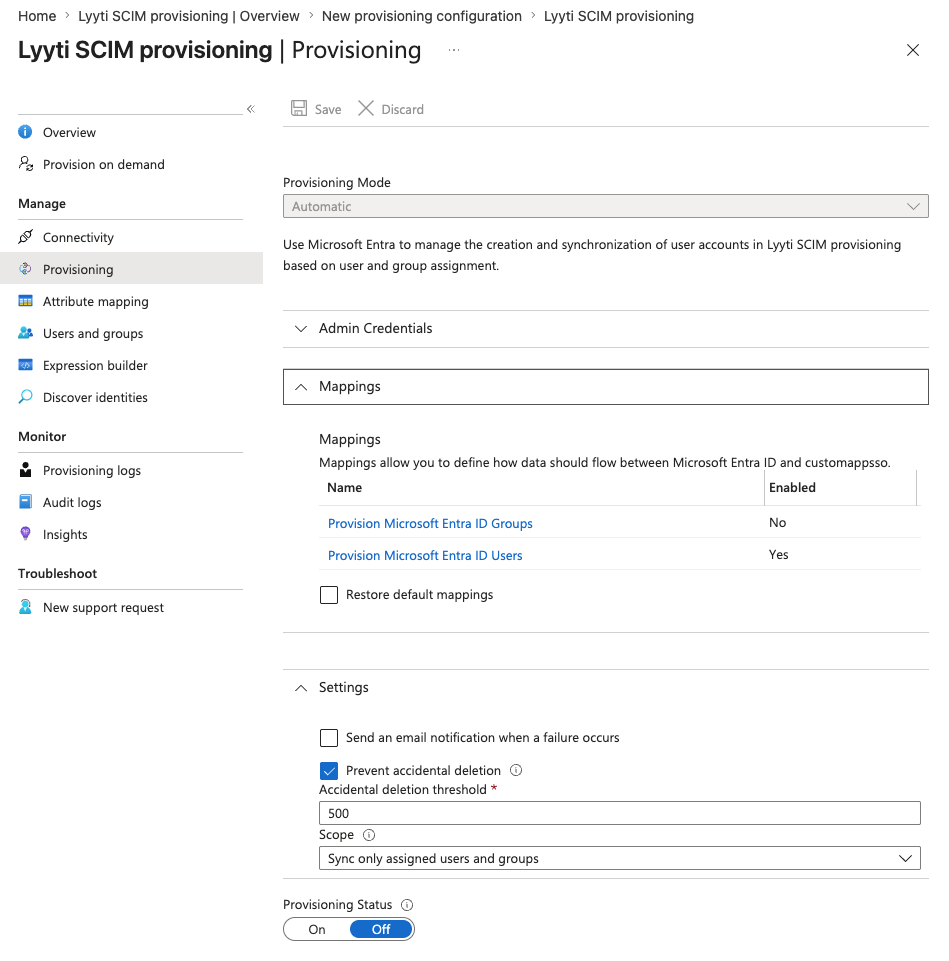
Once it has finished saving, you can configure the field mappings from the provisioning page. Make sure to turn group mapping off, as Lyyti does not support it.
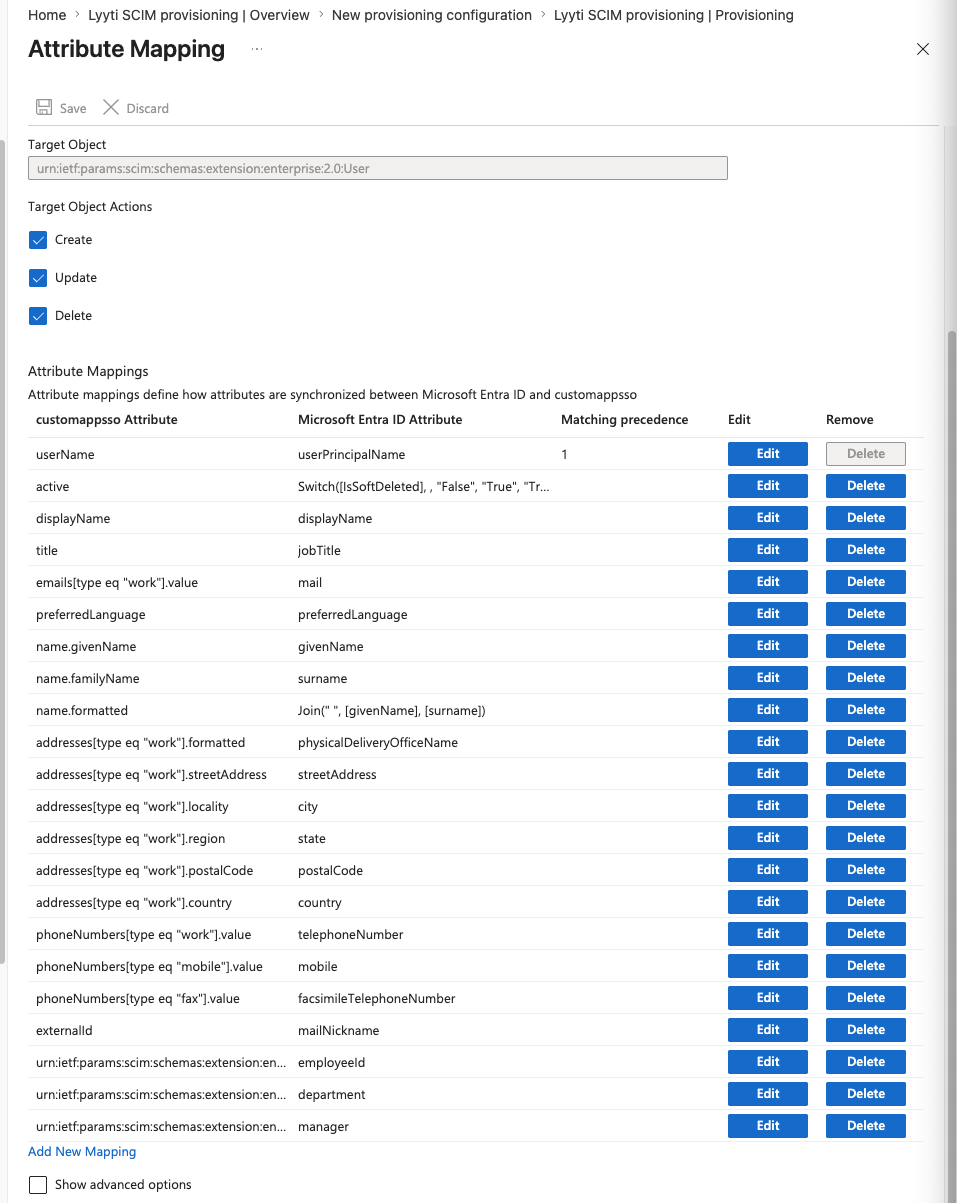
In the Users mappings, remove the default fields not supported by Lyyti. The list is initially very long:
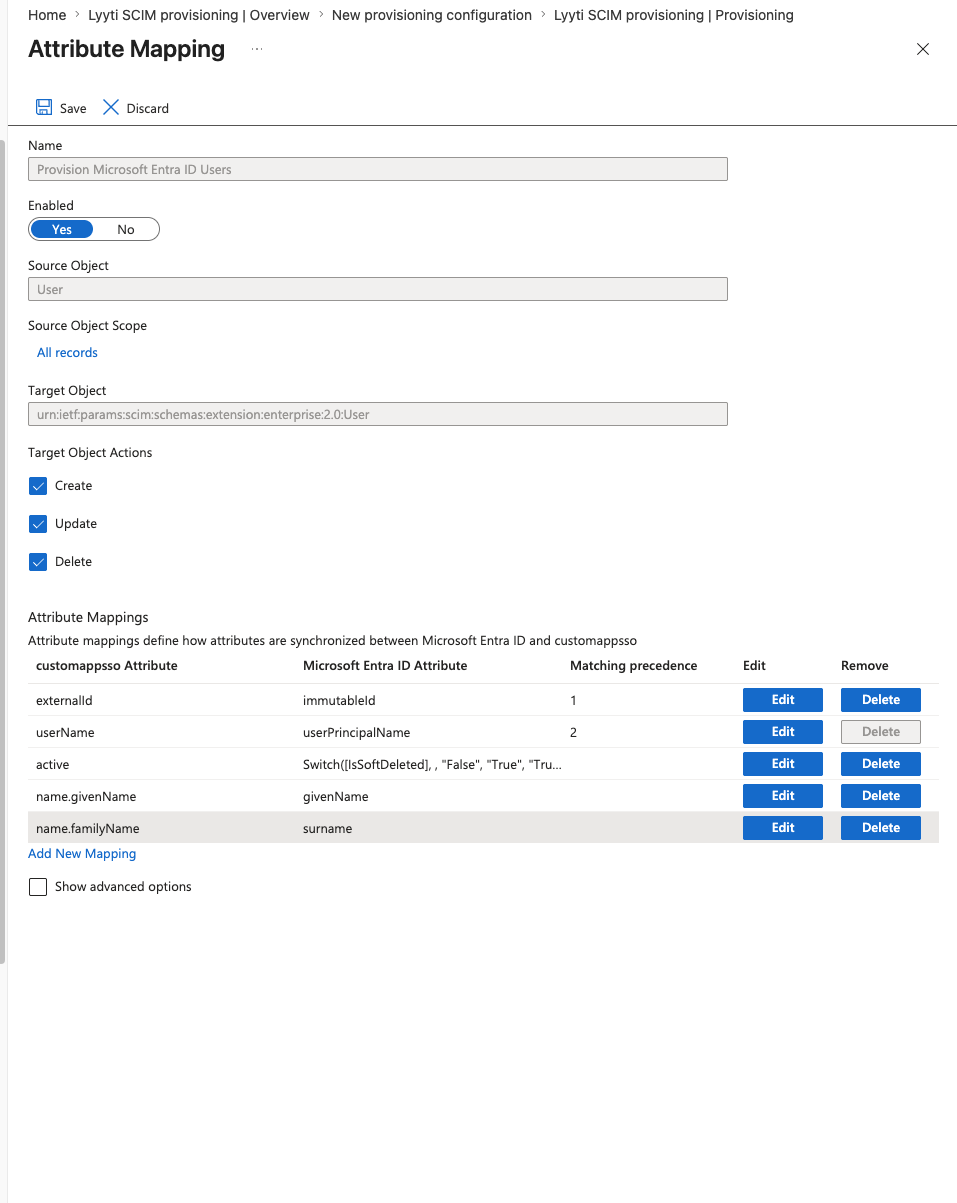
Below is the bare minimum configuration. the default mapping for externalId is incorrect, so you need to do some changes:
- change the matching precedence of userName to 2
- re-map externalId to immutableId and set its precedence to 1.
This ensures that if you change the username (email) of a user, its connection to the lyyti user is not lost.
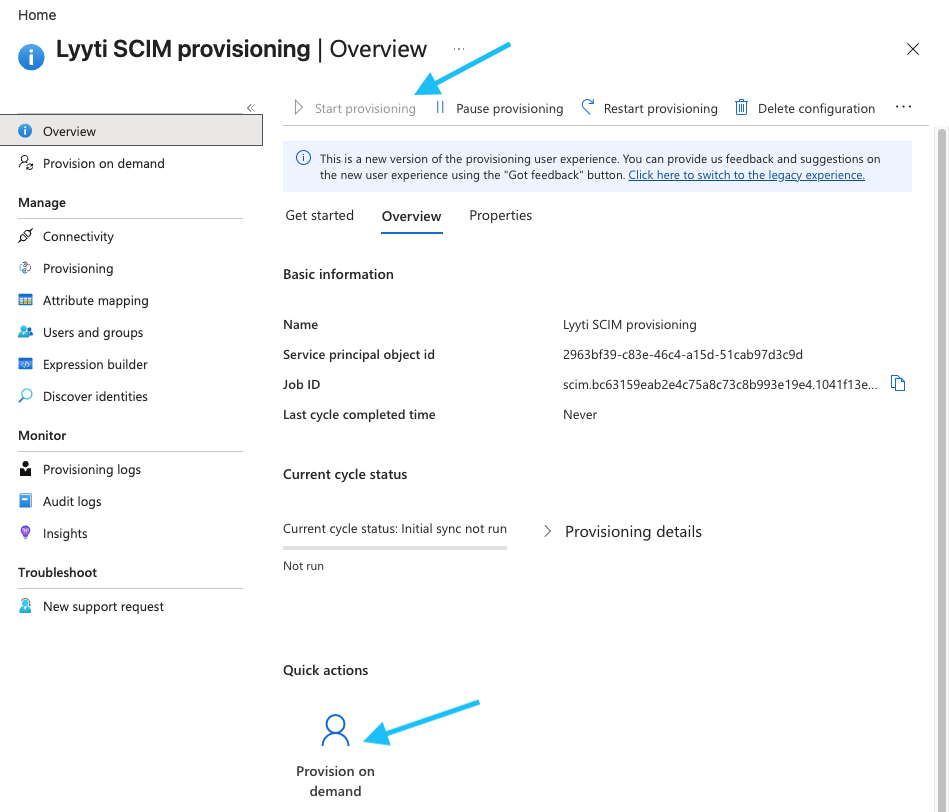
Once you are confident in your settings, you can start provisioning by going to the overview and clicking "Start provisioning". The checkbox/slider on the provisioning page does not work! It doesn't start syncing immediately, so to test that it actually works, click "provision on demand" under quick actions and select a user that should be created in lyyti (or one that already exists).
Updated 4 months ago